Discover the step-by-step process for replace the battery of your Dyson vacuum, applicable to all models. Keep your Dyson running efficiently.
Introduction How To Replace Battery:
Maintaining your Dyson vacuum’s performance is essential for effective cleaning sessions. One crucial aspect of maintenance is replacing the battery when needed. Whether you own a cordless Dyson V series, a Dyson Cyclone, or any other model, this guide provides detailed instructions for battery replacement, ensuring seamless operation.
Understanding Dyson Vacuum Batteries
Dyson vacuums come with various battery types, including lithium-ion and nickel-cobalt-aluminum (NCA) batteries. These batteries provide the power necessary for efficient cleaning.
Exploring Battery Compatibility
Ensure compatibility by checking your Dyson model’s specifications and identifying the compatible battery type.
Checking Battery Health
Monitor battery health regularly to determine when replacement is necessary, ensuring optimal vacuum performance.
Signs Your Dyson Vacuum Battery Needs Replacement
Identifying when it’s time to replace the battery is crucial for maintaining your Dyson vacuum’s efficiency.
Diminished Cleaning Performance
Noticeable reductions in suction power or runtime indicate battery deterioration and the need for replacement.
Frequent Charging
If your Dyson vacuum requires more frequent charging than usual, it may indicate battery degradation.
Getting Ready to Replace The Batteries
Prepare a suitable workspace and assemble the required tools before beginning the replacement operation.
Tools Needed
Before you start the replacement, make sure you have the necessary instruments, such as screwdrivers and fresh batteries.
Workspace Configuration
Establish a well-lit, secure work area with lots of natural light to help with the overhaul.
How to Replace the Battery of Dyson Vacuum: A Step-by-Step Guide
To properly replace the battery in your Dyson vacuum, according to these comprehensive instructions.
Check Full details about Dyson Vacuum
Safety Measures
To avoid mishaps, make sure the vacuum is disconnected and turned off before operating.
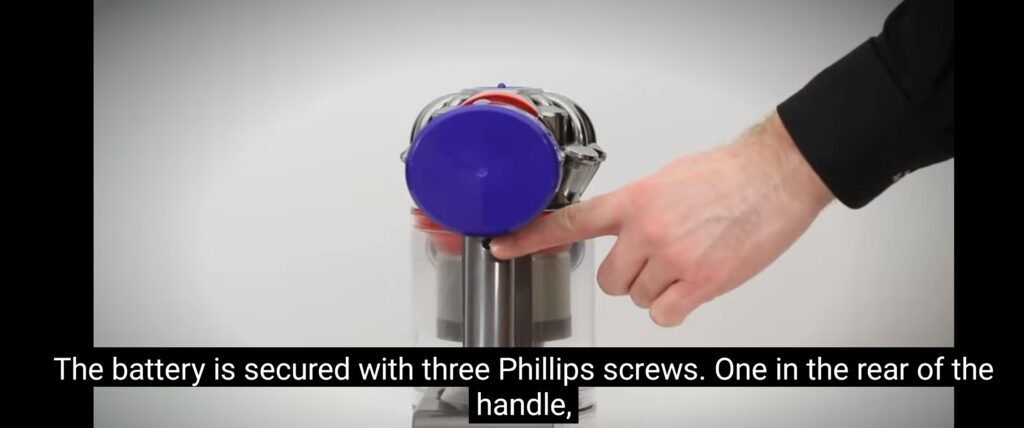
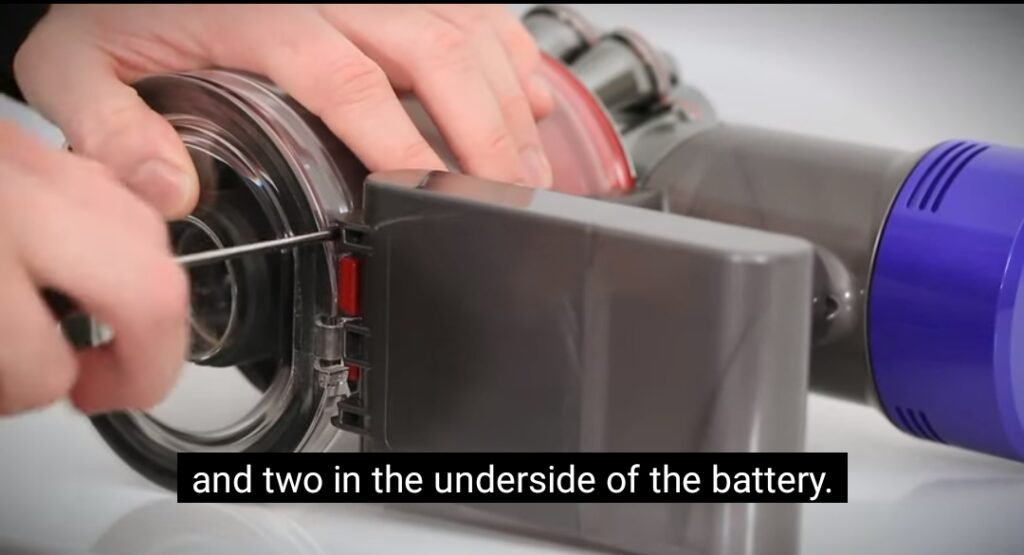
Getting to the Battery Chamber
Find the battery compartment on your Dyson vacuum and use the right tools to carefully open it.
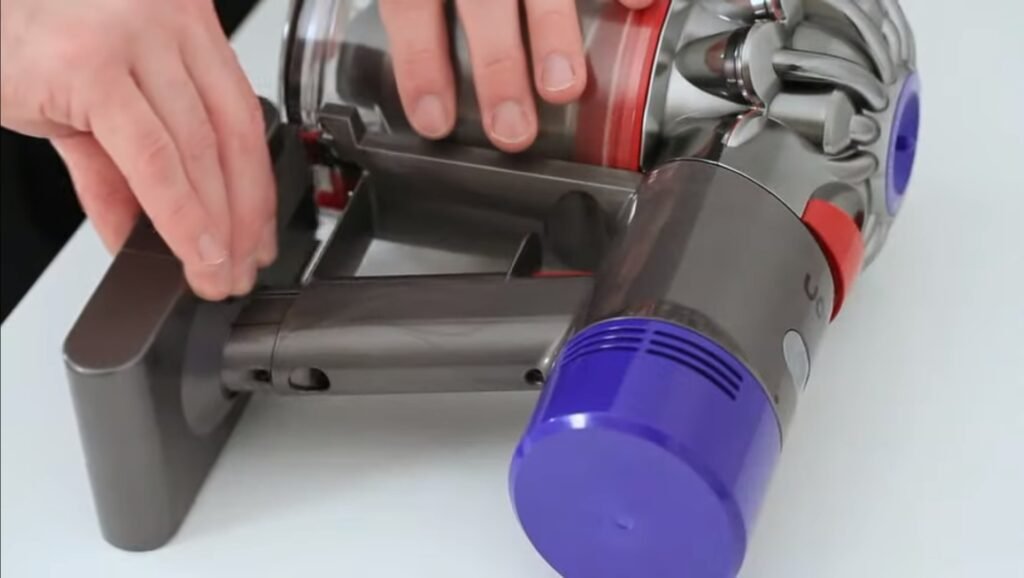
Removing the Old Battery
Gently disconnect the old battery from its housing, ensuring no damage to any surrounding components.
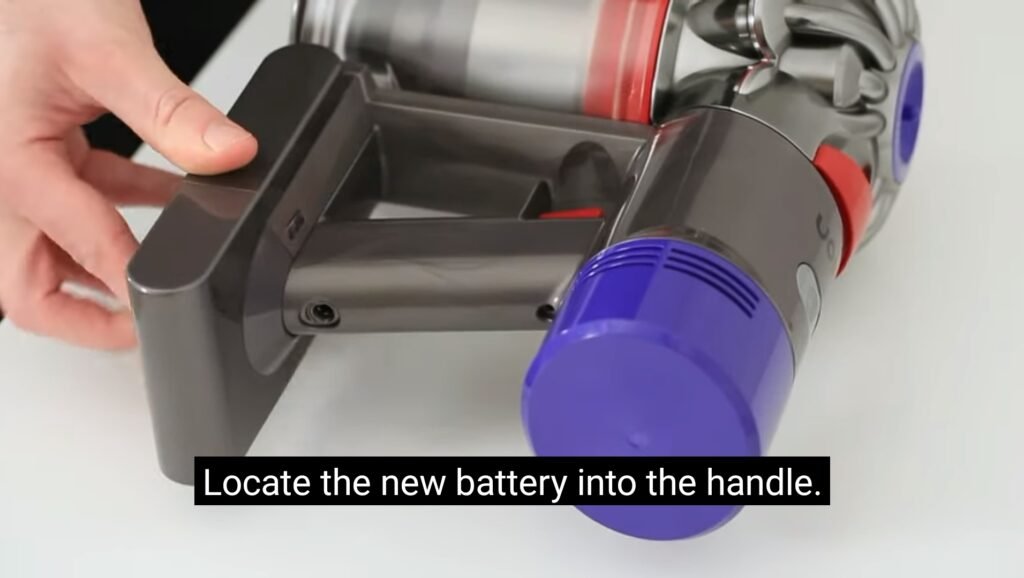
Setting Up the New Battery
Make sure the new battery is positioned and connected correctly by carefully sliding it into the holder.
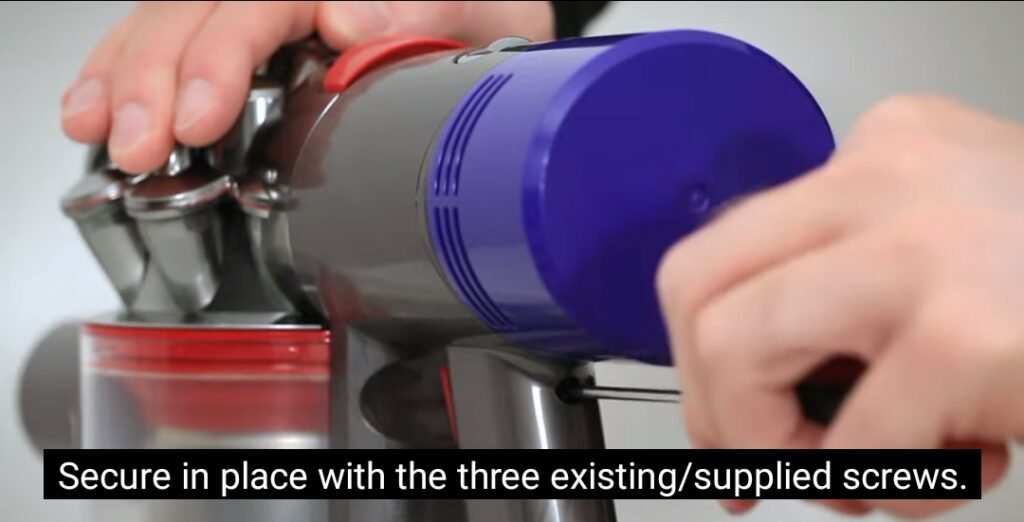
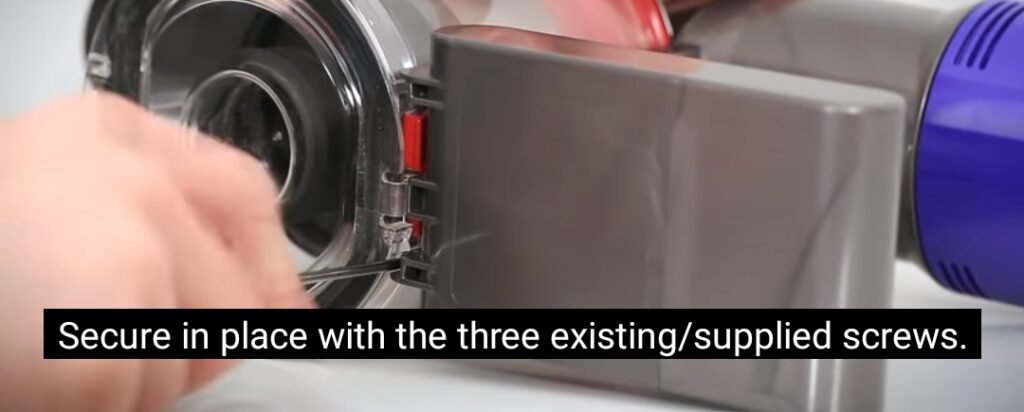
Securing the Compartment
Close and secure the battery compartment, ensuring it is properly sealed to prevent dust and debris ingress.
Testing and Troubleshooting To Replace The Battery.
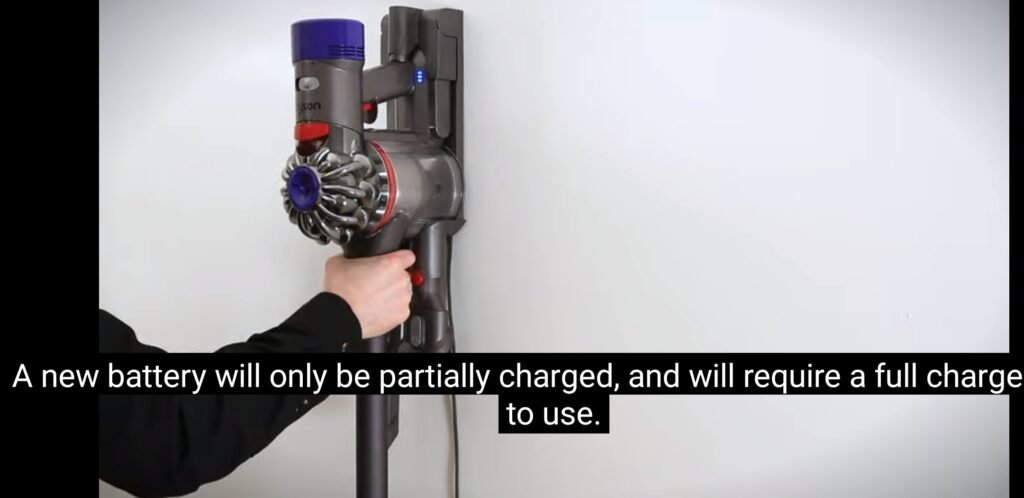
After replacing the battery, test the vacuum to ensure it functions correctly.
Testing
Turn on the vacuum and test its suction power and runtime to confirm proper battery installation.
Troubleshooting
If you encounter any issues, refer to the troubleshooting section for guidance on resolving common problems.
Maintenance Tips to Extend Battery Life.
Optimizing Charging
Avoid overcharging by unplugging the vacuum once the battery is fully charged, prolonging battery life.
Regular Cleaning
Keep the vacuum and battery contacts clean to ensure optimal performance and longevity.
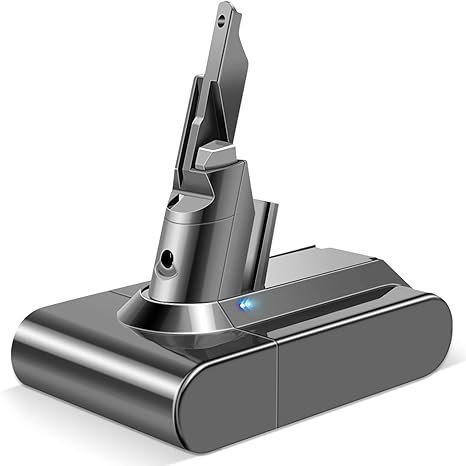
Dyson V7 and V8 Cordless Vacuum Battery Replacement.
Are you noticing a decline in performance from your Dyson V7 or V8 cordless vacuum? It might be time to replace the battery. Don’t worry; replacing the battery is a simple task that you can do at home with the right tools and guidance.
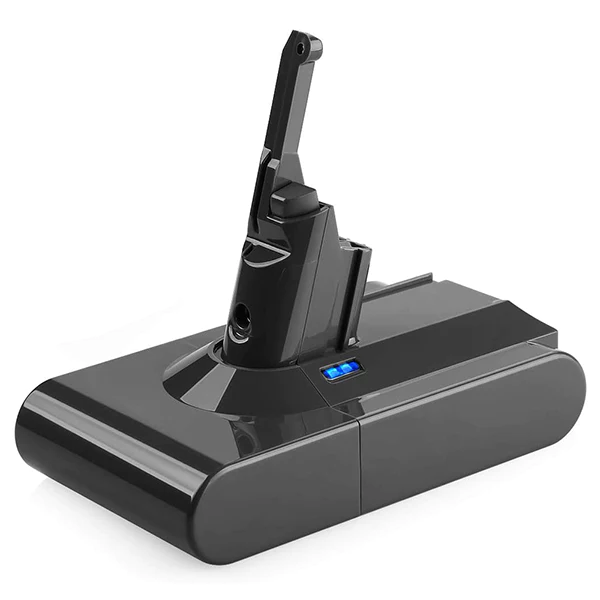
Tools Required for Replace the Battery
Before you begin, ensure you have the following tools ready:
- Phillips head screwdriver.
- Replacement battery compatible with Dyson V7 or V8.
- Flathead screwdriver (optional for prying).
Steps to fix a Dyson V7 and V8 battery:
Frequently asked questions (FAQs) How To Replace The Battery.
- How often should I change the Dyson V7 or V8 battery?
Depending on usage, these devices’ batteries usually last between one and two years. It could be time for a replacement if you observe a noticeable drop in performance. - Can I replace my battery with any other?
Using batteries made especially for the Dyson V7 or V8 is essential for compatibility and safety. - Is the battery capable of being overcharged?
Indeed, the battery can be harmed by overcharging. To prevent this problem, always unplug the vacuum when it has finished charging. - How should I safely dispose of my old battery?
For information on how to dispose of rechargeable batteries properly, contact your local waste management organization. - After changing the battery, what should I do if my vacuum doesn’t start up?
Make sure the new battery is inserted correctly by double-checking the connections. For assistance, get in touch with Dyson customer service if the problem continues.
Conclusion:
The simple act of replace the battery in your Dyson V7 or V8 cordless vacuum can greatly extend its longevity and enhance its performance. You may prolong the life of your vacuum by adhering to the preceding instructions and performing routine maintenance.